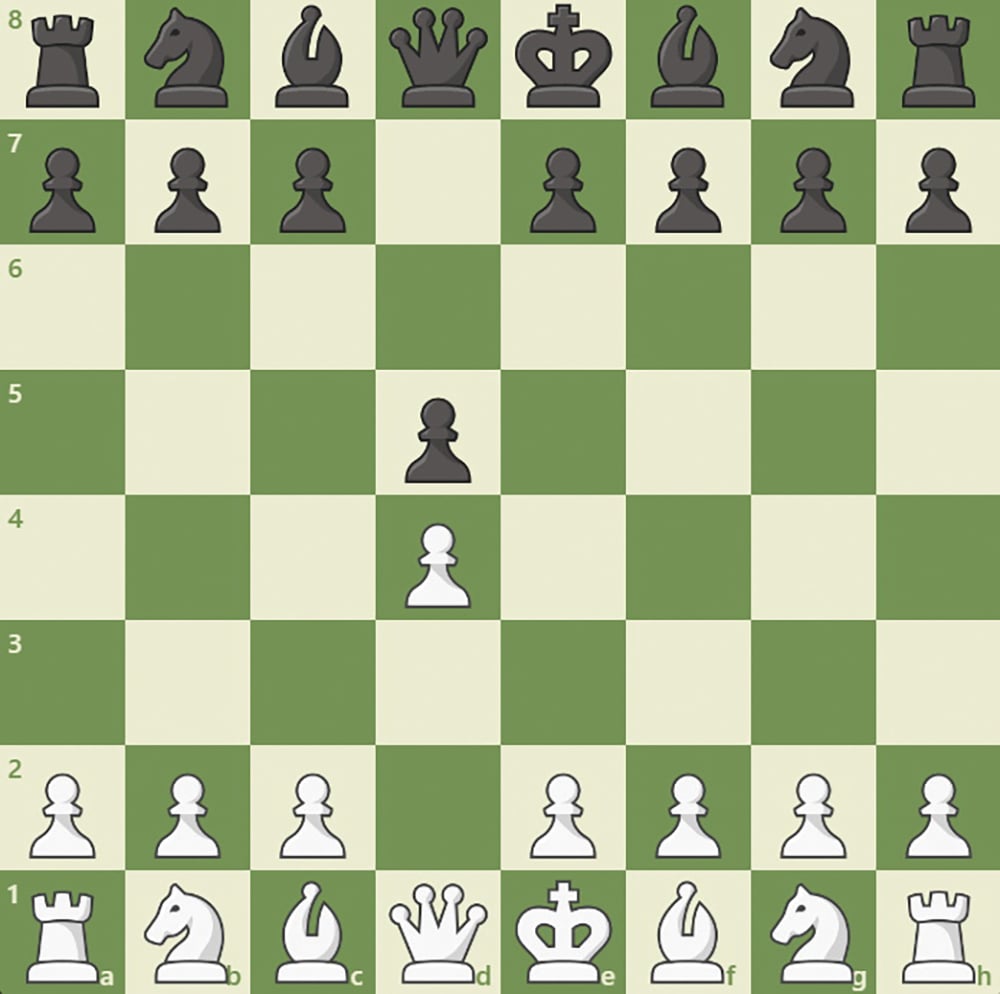
In chess, a positional sacrifice is the giving up of material in exchange for various positional advantages, including taking more space, conquering a particular color complex or weakening the opponent’s position so a future attack can be executed. This concept is well demonstrated by the extremely common opening and namesake for the popular netflix show, “The Queen’s Gambit.” The opening consists of an immediate pawn sacrifice in the position displayed in Figure 1 in which white plays pawn to c4. The move completely gives up the pawn, allowing the d5 pawn to capture on c4, but in return white gains significant positional compensation. With the black pawn no longer on d5, white has free rein to take control of the center with moves like e4 and gains a space advantage that allows for greater piece maneuverability. Additionally, the black now c4 pawn is extremely vulnerable, and it can often come at a severe positional cost for black to defend it from being captured by the f1 bishop, for example, as moves like b5 greatly weaken black’s queenside. Therefore, despite the fact that white is now down material, white nevertheless has the minor edge.
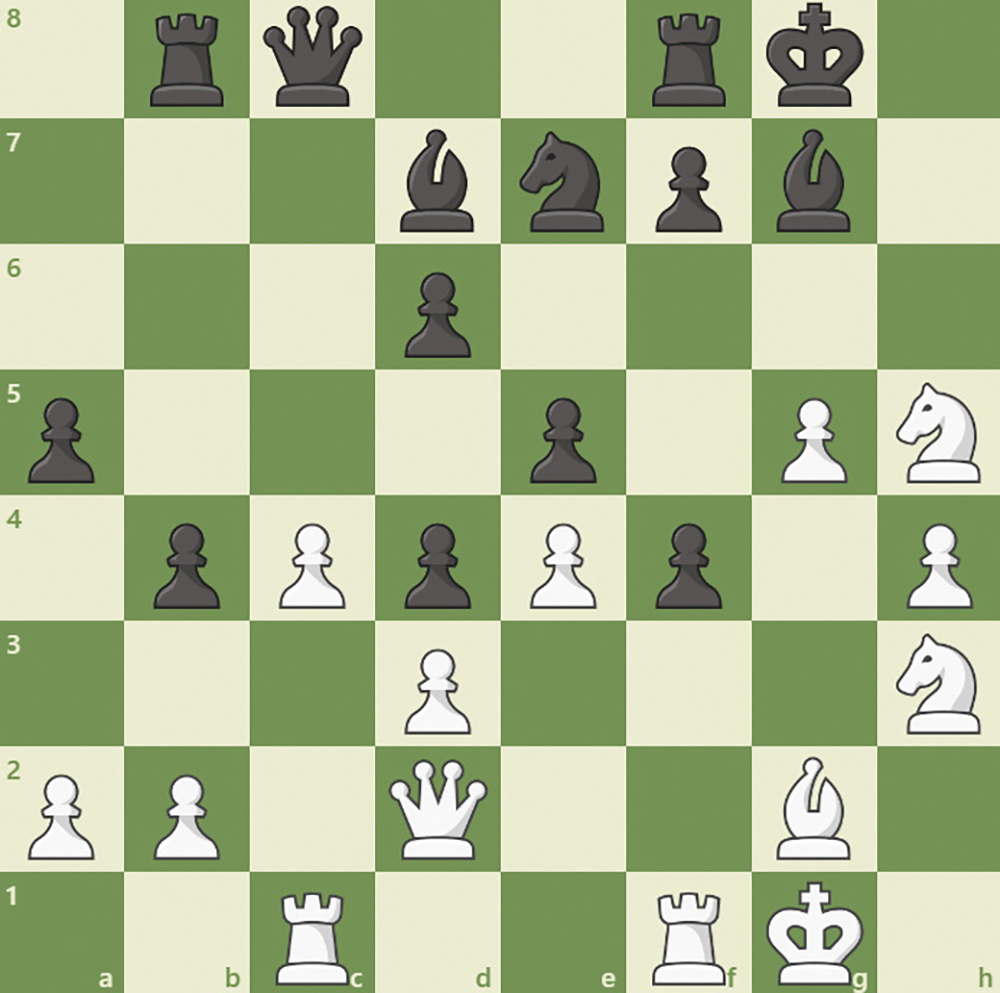
Figure 2 is a position from the 1911 British Championship between Joseph Blackburne with white and John Parry with black. Material is equal and pawn chains interlock across the board, making it difficult for both sides to make much progress. Therefore, Blackburne began with the positional sacrifice, 1. N3xf4 exf4 to break open the f file so that white can use it to atack black’s previously blocked-off kingside. However, before immediately capturing back, white first further weakens the black king with 2. Nxg7 Kxg7 and only then 3. Qxf4. While white is slightly better with strong attacking chances due to the opening of the black king, black can still hold the position but here black makes the losing mistake 3… Ng6. The seemingly innocuous move allows white to continue his plan of crashing into blacks kingside quickly with 4. Qf6+ Kg8 5. h5, pushing the pawns down into the king while also attacking the knight, demonstrating the flaw of putting it on g6. If black attempts to save the g6 knight by playing Ne5, checkmate is forced after h6 as Qg7 is an unstoppable threat. Therefore, black is forced to give up the knight and played 5… Qd8 6. hxg6 Qxf6 7. Rxf6. After the big exchange, white ends up 2 pawns with significantly more active pieces. The game continued 7… Bg4 8. Rxd6 Rfd8 9. e5 Rxd6 10. exd6 fxg6 11. c5 and white is completely winning with a 2 pawn advantage, stronger pieces and connected passed pawns on the c and d files. 11… Be6 12. c6 Rd8 and Blackburne finishes the game off in style with the sacrifice 13. Bd5 because after Bxd5, white has c7 and black cannot prevent the pawns from queening. The game ended 13… Rxd6 14. Bxe6 Rxe6 15. c7 and black resigned.
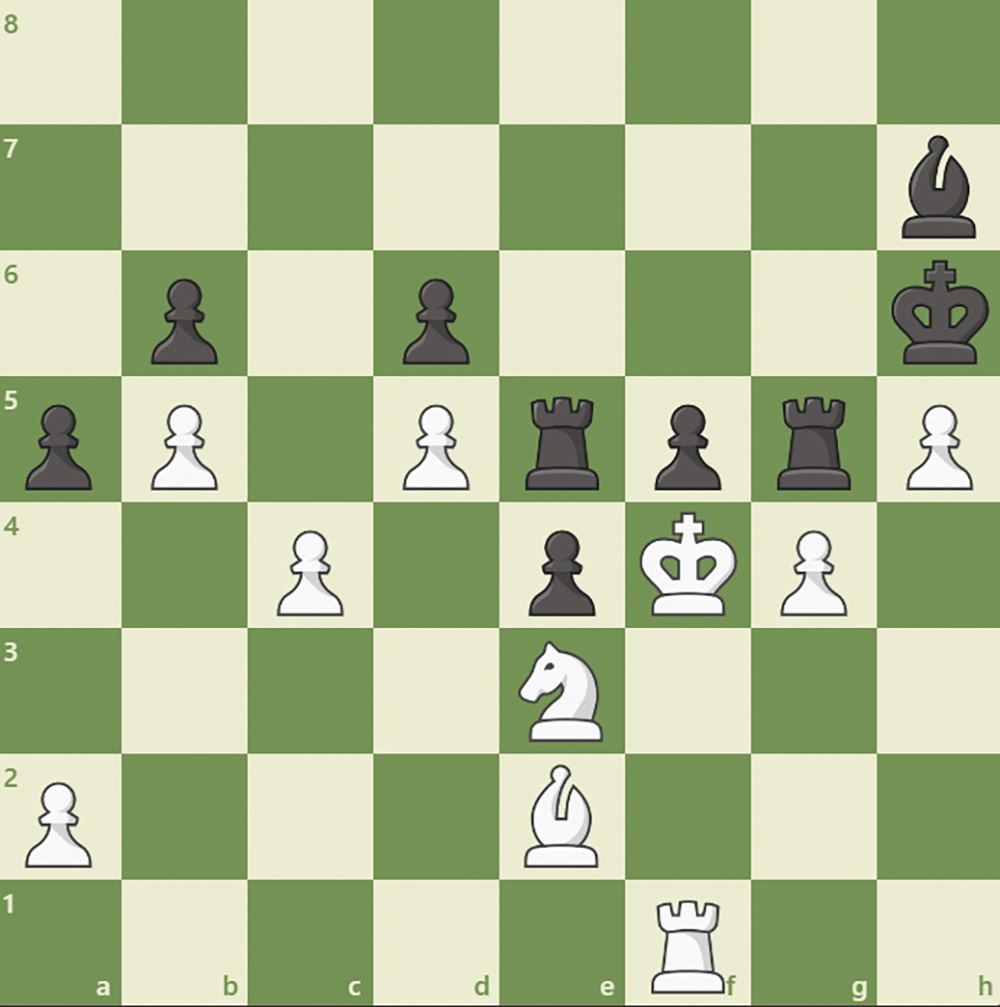
Figure 3 is a position from a game between Yasser Seirawan with white and Zdenko Kozul with black from the 1991 Hoogovens. Black is up a rook for a knight and a pawn and appears to have completely suppressed white pawn advances. Here, Seirawan found the brilliant sacrificial breakthrough pawn to c5, breaking open black’s queenside pawn blockade. The d6 pawn cannot capture as it is guarding the e5 rook, so Kozul captured on c5 with the b6 pawn. This, however, allows white to utilize the opening and push forward with pawn to b6. Due to the poor positioning of the black pieces, black is ill-equipped to handle the breakthrough of the b pawn and the rest of whites ensuing pieces, resulting in a winning endgame for white.
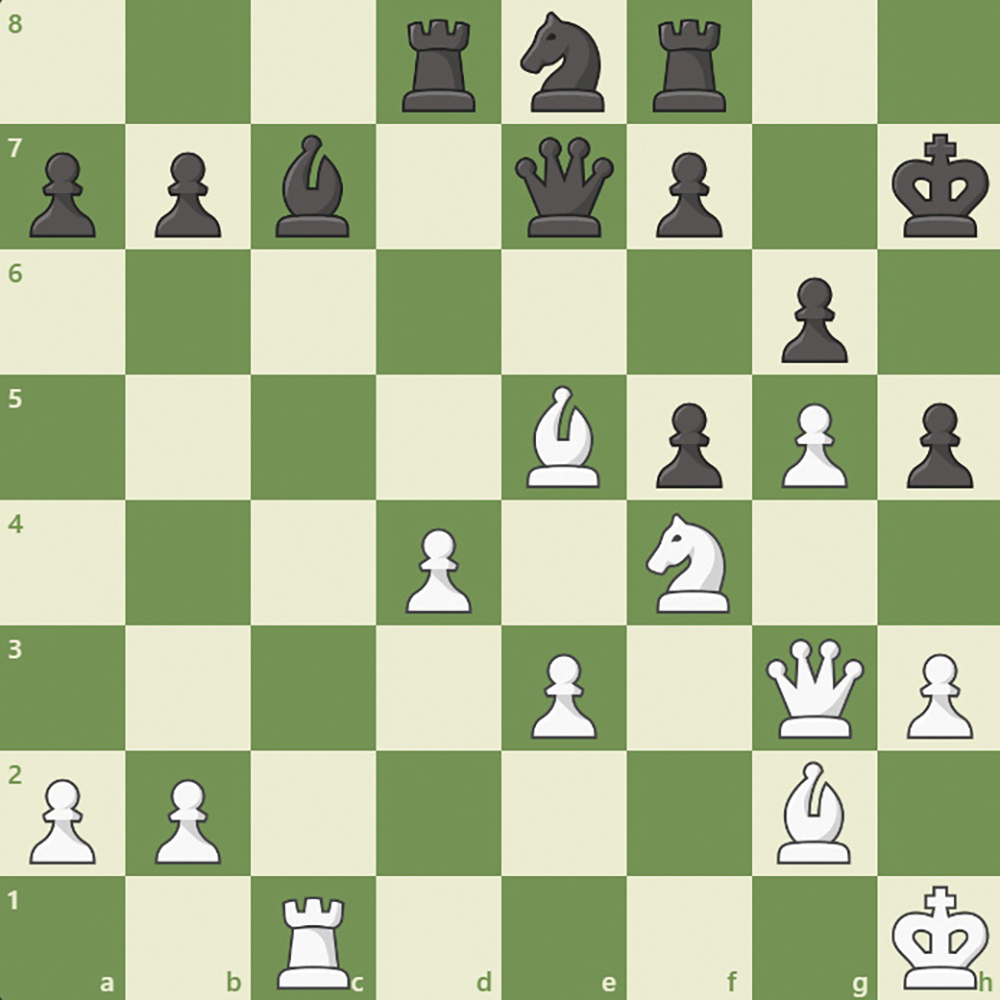
The position shown in Figure 4 is from a game between Vladimir Kramnik with white and Matthias Bluebaum with black at the 2017 Dortmund Sparkassen. Black is already up a rook for a bishop but white has very active pieces and the dark squares around the black king are considerably weak. Therefore, Kramnik sacrificed a second exchange with the move rook takes c7, giving up his rook for the dark square bishop so that he will have control over the dark squares around the black king, rendering it far more susceptible to a fatal attack. It is for this reason that after knight takes c7 and bishop to f6, after the queen moves out of the way, it is a mistake for white to take the d8 rook. Instead, it is best for white to keep the dark squared bishop on the board and, in fact, Kramnik ultimately won the game by forcing checkmate with his dark squared bishop and queen.
Ethan Feder is a junior at Yeshivat Frisch, a chess enthusiast and player. The goal of his column is to teach and discuss chess concepts through example positions, high-level games and relevant puzzles, along with explanations. Feel free to contact him with any questions, suggestions or comments at [email protected].